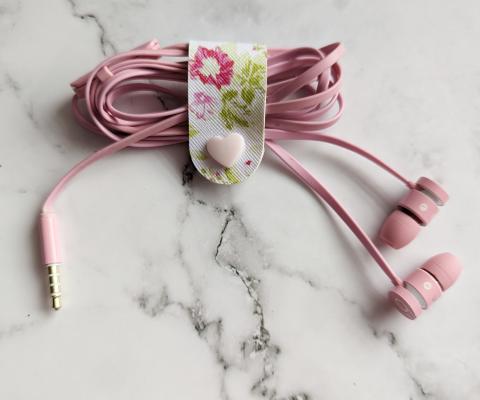
These cabel ties turned out super cute and are relatively easy to make once you make a few. You can use them to help keep headphones from tangling up in your purse or backpack, to keep cables bunched up neatly in boxes, or whereever else you need to. They can be made as big or as small as you would like and this is a great way to use up some scraps if you're looking for a way to use it up.
So far I have only used snaps to make the tidies, but I want to try and make coin purses and wallets. I found making these little tidies was a good way to learn how to use the snaps. I suggest watching a YouTube video on how to attach the snaps if it's new to you. I didn't find the instructions all that helpful but that could be just for the kit I bought. The kit came with different shapes, colours, some where plastic and some where metal so you can mix and match the colours.
Materials
- Faux leather sheet - Amazon, craft store or fabric store (providing they carry)
- Snaps and snap pliers kit - Amazon (click here) this is the one I got.
- Cricut Maker
- Cricut Design Space - Computer or tablet
- Rotary blade
- Pink fabric mat
- Excato knife or scissors - to help cut off random pieces if needed.
- Bulldog clip to help hold the strip even
How to make
Creating the leather strip image
- Open Cricut design space
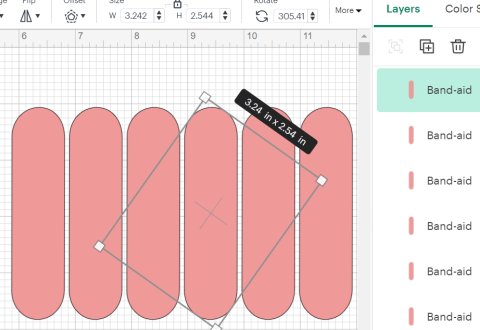
- Depending if you want the ends to be squared choose a rectangle or since I wanted rounded ends I searched for a band-aid image and deleted the pieces I didn't need.
- I sized it to around 2.54 inches by 3.24 inches or chose the size you want to work with. Cut a test piece with paper to see if it the right size you want.
- Once happy with the size, duplicate the shape as many times as you need.
Cutting the faux leather
- Turn on the Cricut and place the rotary blade into the clamp.
- Place the faux leather on the pink fabric mat.
- Take the brayer, and run it over to help adhere it to the mat.
- Go to "make it" and choose mat for “any material” option.
- Choose "faux fur" and add more pressure to help cut through.
- Load the machine when the "arrow" starts flashing.
- Click the flashing "C" when prompted to begin the cut.
- Unload the mat when prompted the “arrow” will start flashing.
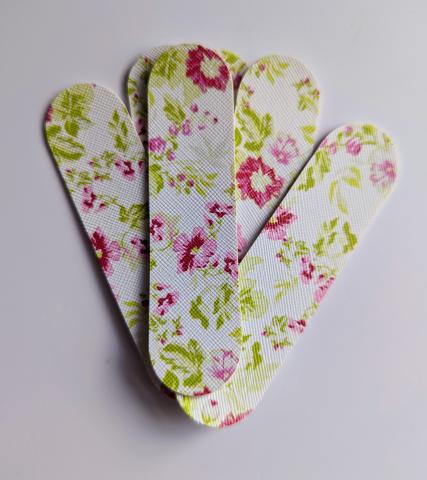
- Peel the faux leather off the mat. Side note - it is a satisfying feeling peeling it off the mat
Adding the snaps

- Fold the leather strip in half and take the bulldog clip and clip to the side to help keep the strip even.
- Take the awl punch (pointy tool) and punch it completely through the leather to create holes for the snaps. This is why I use the bulldog clip it keeps it even, I did it without the clip and the holes didn’t line up properly.
- Pick the snaps you want to attach to the leather strip.
- Push the snaps through the hole and use the clamp to push down the two pieces together to do this for both sides. Read the instructions or watch a YouTube video. It took me a few tries to figure it out.
- Test the snaps to make sure they work.
If you have an questions or comments pop them in the box below I would love to hear from you.